SharePoint is a powerful platform for collaboration, allowing teams to work together and share information seamlessly. One of the features that makes SharePoint particularly useful is its ability to share sites and content with guest users. This capability is essential for organizations that need to collaborate with external partners, clients, or vendors. In this blog, we’ll explore how to enable and manage guest users for site sharing in SharePoint.
What Are Guest Users?
Guest users are external users who have been granted access to your SharePoint site. These users can be clients, vendors, or any other external stakeholder with whom you need to share information. Guest users do not need a full SharePoint or Microsoft 365 license; they can use a limited set of features to work with internal team.
Enabling Guest Access in SharePoint
Before you can share your SharePoint site with guest users, you need to enable external sharing at both the SharePoint admin center and site level.
Enable External Sharing in the SharePoint Admin Center:
- Go to https://admin.microsoft.com and sign in with your admin account
- Under the “External sharing” section, choose SharePoint
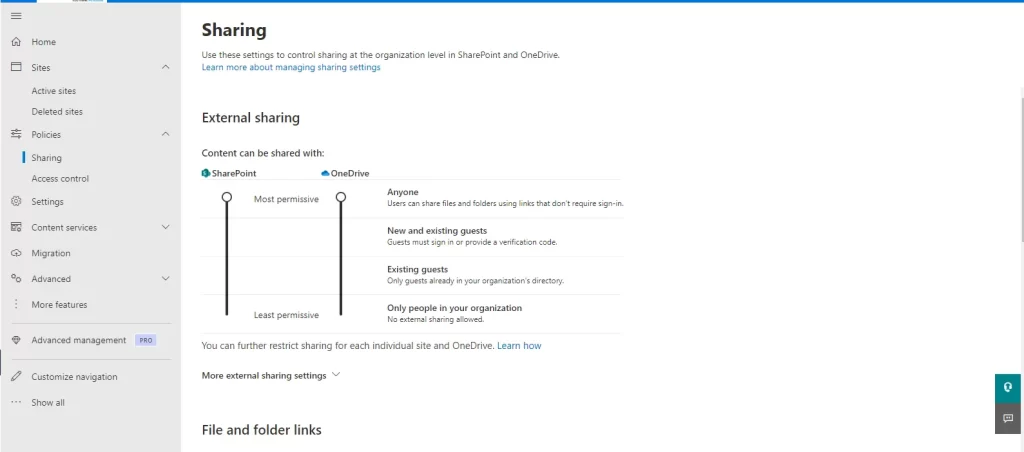
- Set the sharing settings to allow external sharing. You can choose from several options
- Anyone: Allow sharing with anyone, including anonymous users.
- New and existing guests: Allow sharing only with guests who already have an account or can create one.
- Existing guests only: Allow sharing only with guests who are already in your directory.
- Only people in your organization: Disable external sharing.
Enable External Sharing for a Specific Site:
- Navigate to the SharePoint site you want to share
- Click on the Settings gear icon in the top right corner and select Site permissions
- Manage Guest Access: Click Invite people and select Share site only
- Enter the email address of the guest user you want to invite, and choose the permission level (e.g., Read, Edit, Full Control)
- Click Share to send the invitation to the guest user
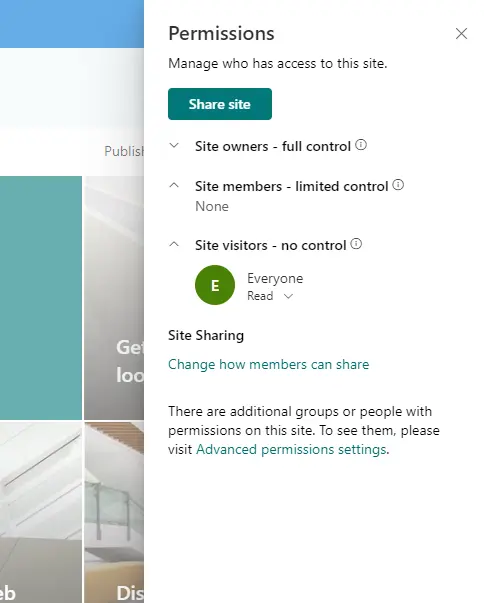
Managing Guest Users
Once guest users have access to your SharePoint site, it’s important to manage their permissions and access regularly.
Viewing Guest Users
1. Site Permissions: Go to Site permissions from the site settings menu.
2. Check Users: You can see a list of all users, including guest users, who have access to the site.
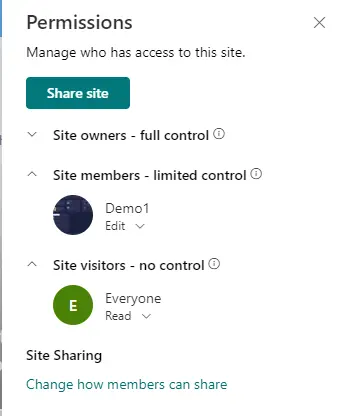
Modifying Guest User Permissions
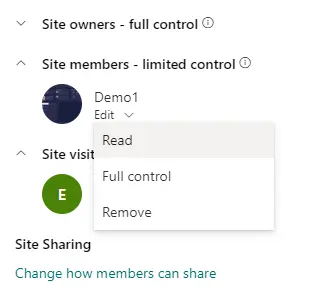
1. Change Permissions: Click on the guest user whose permissions you want to change.
2. Adjust Roles: Modify their role to either increase or decrease their access level.
3. Save Changes: Confirm and save the changes.
Removing Guest Users
1. Remove Access: If a guest user no longer needs access, select the user and click Remove user.
2. Revoke Sharing Links: Ensure that any sharing links previously sent to the guest user are revoked to prevent future access.
Consideration for Managing Guest Users:
Regular Audits:
Periodically review the list of guest users and their permissions to ensure that only necessary users have access.
Set Expiration Dates:
For time-sensitive projects, set expiration dates for guest access to automatically revoke permissions after a certain period.
Educate Users:
Train your internal users on the importance of managing guest access and sharing responsibly.
Summary
Enabling and managing guest users for site sharing in SharePoint is a crucial feature for organizations that need to collaborate with external partners. By following the steps outlined above, you can ensure that your SharePoint sites remain secure while allowing seamless collaboration with guest users. Regularly review and manage guest access to maintain a secure and efficient sharing environment.
What’s the Real ROI of SharePoint Syntex for Your Organisation?
Get a practical ROI calculator + implementation checklist used by enterprises to modernize SharePoint with AI, without trial-and-error.


