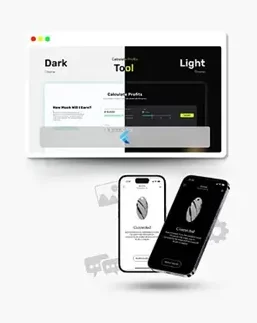
Flutter provides a powerful framework to create beautiful cross-platform apps with a native feel. One of the most requested features in mobile apps is theme support, where users can toggle between light and dark modes based on their preferences. In this tutorial, we’ll walk you through implementing light/dark mode functionality in Flutter using MobX state management.
What is MobX?
MobX is a reactive state management library for Dart that allows you to manage application state in a simple and efficient way. With MobX, you can easily observe changes in your app’s state and automatically update the UI without needing to manually handle rebuilding widgets.
Why Use MobX for Theme Management?
MobX is a great choice for theme management because:
- Reactivity: MobX makes it easy to react to changes in theme settings and automatically update the UI.
- Simplicity: MobX provides a clean and simple API to manage state, making it perfect for light/dark mode.
- Maintainability: By separating your theme logic from UI code, your app becomes more modular and easier to maintain.
Let’s dive into the implementation!
Table of Contents:
- Introduction
- Prerequisites
- Step 1: Setting Up Your Flutter Project
- Step 2: Adding Dependencies
- Step 3: Creating the Theme Store
- Step 4: Integrating the Store with Your App
- Step 5: Creating the Home Screen
- Conclusion
1. Introduction
In this guide, we’ll walk through the process of integrating light and dark mode themes into your Flutter application using MobX for state management. With the growing demand for dark mode in apps, this implementation will ensure your app is user-friendly and visually appealing in any lighting condition.
2. Prerequisites
Before diving in, make sure you have:
- Basic knowledge of Flutter
- Familiarity with MobX for state management
3. Step 1: Setting Up Your Flutter Project
First, create a new Flutter project or open your existing one. Ensure you have the latest version of Flutter and Dart.
flutter create light_dark_mode_demo
cd light_dark_mode_demo
4. Step 2: Adding Dependencies
Add the necessary dependencies for MobX and Flutter hooks in your pubspec.yaml file.
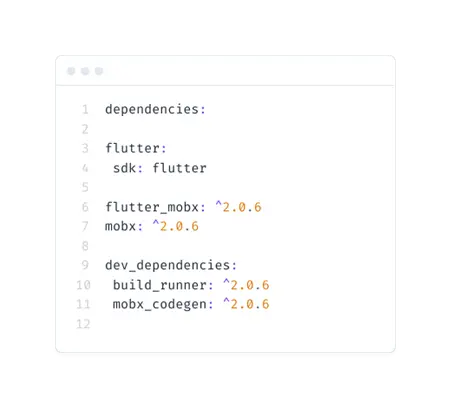
Run flutter pub get to install the dependencies.
5. Step 3: Creating the Theme Store
Create a new file called theme_store.dart in the lib directory. This file will contain the MobX store for managing the theme state.
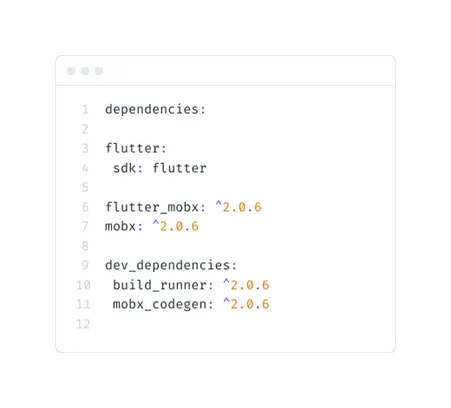
Run the code generator to create the necessary files.
flutter packages pub run build_runner build6. Step 4: Integrating the Store with Your App
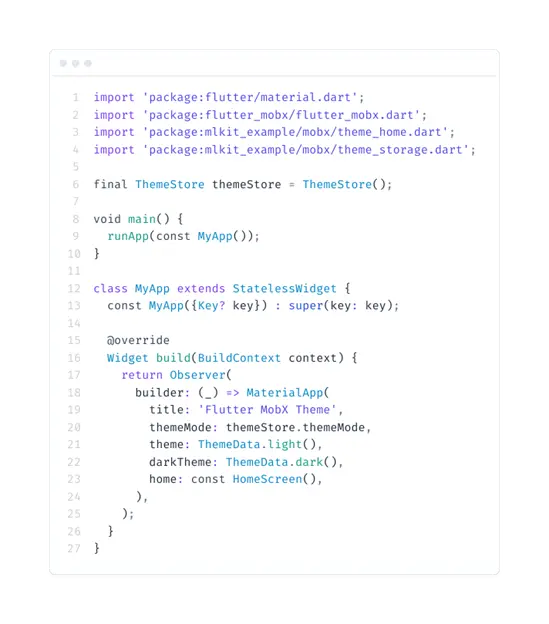
In your main.dart file, create an instance of the ThemeStore and provide it using a Provider.
7. Step 5: Creating the Home Screen
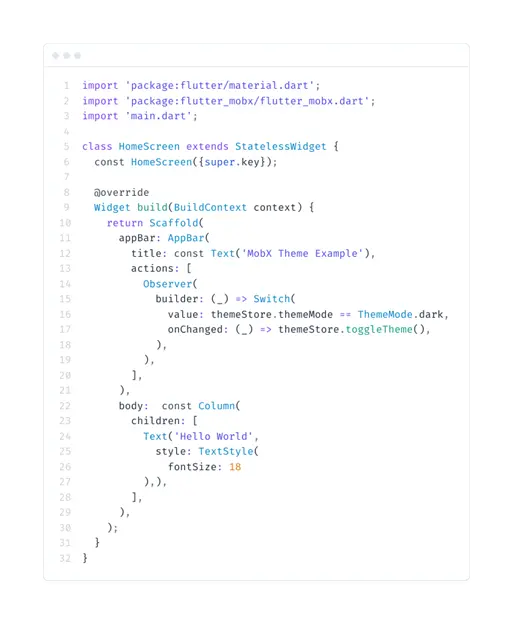
Creating the Home Screen Create a new file called home_screen.dart and implement the home screen with a toggle button to switch themes.
Here are some resources to guide you through the process:
- Flutter Official Website: Provides comprehensive documentation and guides on Flutter development, including theming and state management.
- MobX for Dart and Flutter Official Website: Offers detailed information and tutorials on using MobX for state management in Dart and Flutter applications.
8. Conclusion
You’ve successfully implemented light and dark mode themes in your Flutter application using MobX for state management. This approach ensures your app remains responsive to user preferences and provides a better user experience. Remember, customization is key, so feel free to tweak the themes and make them unique to your app. Happy coding!
I hope this helps! If you need any more details or have questions, feel free to ask.


