Amazon S3 is a reliable and scalable object storage service offered by AWS. In this tutorial, we’ll walk through how to upload files to Amazon S3 in a Laravel application—from setting up your AWS credentials to handling file uploads using Laravel’s built-in storage system.
Step 1: Create an S3 Bucket and IAM User
1.1 Create an S3 Bucket
- Log in to your AWS Console.
- Navigate to S3 from the list of services.
- Click Create Bucket.
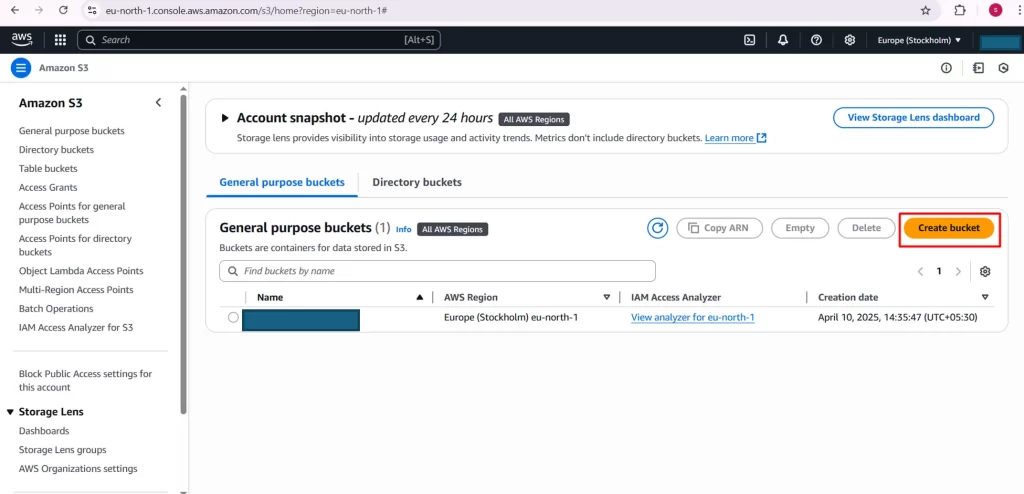
- Enter a unique bucket name and select a region.
- Leave default settings unless specific access settings are needed.
- Click Create Bucket to finish.
1.2 Create IAM User with S3 Access
- Navigate to the IAM Console.
- Click Users > Add User.

- Enter a username (e.g., laravel-uploader).
- Choose Programmatic access as the access type.
- Click Next: Permissions.
- Select Attach existing policies directly and choose AmazonS3FullAccess.
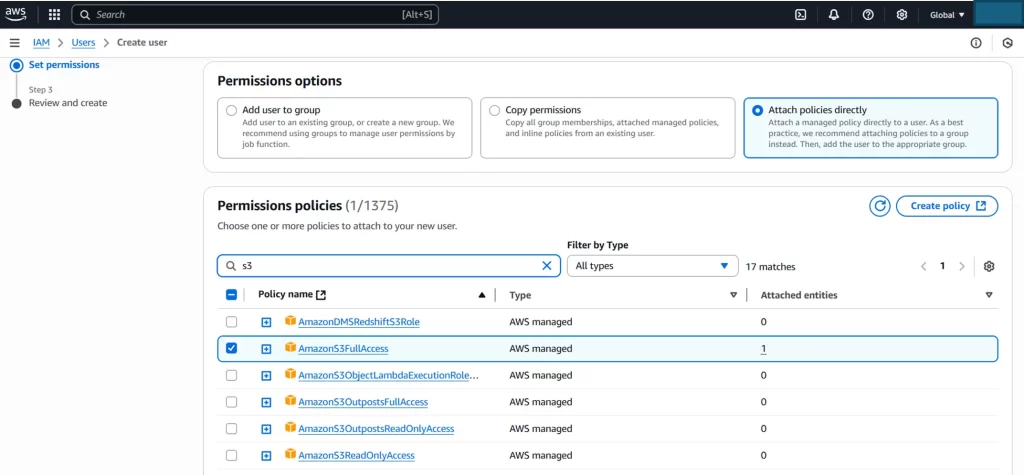
- Skip the remaining steps or add tags as needed.
- Click Create User.
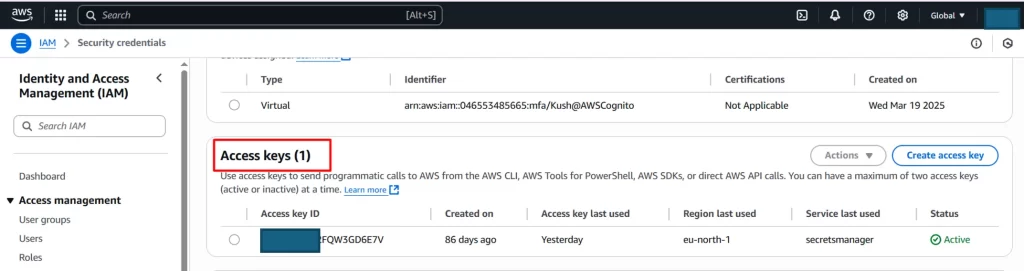
- Copy and save the Access Key ID and Secret Access Key—you’ll need these for Laravel.
Step 2: Install Laravel
composer create-project --prefer-dist laravel/laravel s3-blogStep 3: Install Amazon S3 Composer Package
If you have not installed amazon s3 package, then you have to install s3 composer package by using following command:
composer require --with-all-dependencies league/flysystem-aws-s3-v3Step 4: Configure AWS Credentials in Laravel
Open your .env file and add the following:
FILESYSTEM_DISK=s3
AWS_ACCESS_KEY_ID=your_aws_access_key AWS_SECRET_ACCESS_KEY=your_aws_secret_key
AWS_DEFAULT_REGION=us-east-2
AWS_BUCKET=your_bucket_name
AWS_USE_PATH_STYLE_ENDPOINT=false
Then, ensure your config/filesystems.php includes the correct S3 configuration:
's3' => [
         'driver' => 's3', 'key' => env('AWS_ACCESS_KEY_ID'),
         'secret' => env('AWS_SECRET_ACCESS_KEY'),
         'region' => env('AWS_DEFAULT_REGION'),
        'bucket' => env('AWS_BUCKET'),
        'use_path_style_endpoint' => env('AWS_USE_PATH_STYLE_ENDPOINT', false),
],
Step 5: Create Routes
Update your routes/web.php to include upload routes:
use App\Http\Controllers\ImageUploadController;

Route::get('image-upload', [ImageUploadController::class, 'imageUpload'])->name('image.upload');

Route::post('image-upload', [ImageUploadController::class, 'imageUploadPost'])->name('image.upload.post');
Step 6: Create Controller
php artisan make:controller ImageUploadControllerThen update app/Http/Controllers/ImageUploadController.php:
namespace App\Http\Controllers;

use Illuminate\Http\Request;
use Illuminate\Support\Facades\Storage;

class ImageUploadController extends Controller
{
    public function imageUpload()
    {
        return view('imageUpload');
    }

    public function imageUpl oadPost(Request $request)
    {
        $request->validate([
            'image' => 'required|image|mimes:jpeg,png,jpg,gif,svg|max:2048',
        ]);
        $path = Storage::disk('s3')->put('images', $request->file('image'));
        $url = Storage::disk('s3')->url($path);

        return back()
            ->with('success', 'Image uploaded successfully.')
            ->with('image', $url);
    }
}
Step 7: Create Blade View
Create a Blade view at resources/views/imageUpload.blade.php:
<!DOCTYPE html>

<html>

<head>

    <title>Laravel S3 Image Upload</title>

    <link rel="stylesheet" href="https://maxcdn.bootstrapcdn.com/bootstrap/4.0.0/css/bootstrap.min.css">

</head>

<body>

<div class="container mt-5">

    <div class="card">

        <div class="card-header">

            <h3>Upload Image to Amazon S3</h3>

        </div>

        <div class="card-body">

            @if (session('success'))

                <div class="alert alert-success">{{ session('success') }}</div>

                <img src="{{ session('image') }}" class="img-fluid mt-2" />

            @endif

            @if ($errors->any())

                <div class="alert alert-danger">

                    <strong>Oops!</strong> There were some issues with your input:

                    <ul>

                        @foreach ($errors->all() as $error)

                            <li>{{ $error }}</li>

                        @endforeach

                    </ul>

                </div>

            @endif

            <form action="{{ route('image.upload.post') }}" method="POST" enctype="multipart/form-data">

                @csrf

                <div class="form-group">

                    <label>Select Image</label>

                    <input type="file" name="image" class="form-control" required>

                </div>

                <button type="submit" class="btn btn-success mt-2">Upload</button>

            </form>

        </div>

    </div>

</div>

</body>

</html>
Step 8: Run and Test
Run your Laravel server:
php artisan serveOpen your browser and visit:
http://localhost:8000/image-uploadTry uploading an image—if successful, the image will be stored in S3 and a preview will be displayed.
Make S3 Files Public:
To make your uploaded images publicly accessible, go to your S3 bucket > Permissions > Bucket Policy, and add:
{
	"Version": "2012-10-17",
	"Statement": [
	{
      	"Sid": "PublicReadGetObject",
      	"Effect": "Allow",
      	"Principal": "*",
      	"Action": "s3:GetObject",
      	"Resource": "arn:aws:s3:::your_bucket_name/images/*"

	}
	]
}
Replace your_bucket_name with your actual bucket name.
Conclusion
You’ve now successfully integrated Amazon S3 file uploading into your Laravel application. This solution is scalable and secure, making it perfect for image and document management systems.